Tuesday, January 15, 2013

What? Brussels Sprouts are DELISH!!

i remember the exact moment when i decided that i liked brussels sprouts. i know it's a weird thing to remember, but weird things tend to be easier to remember than run-of-the-mill stuff. wow. so when kasia and i decided to join the Bountiful Baskets food co-op, we knew that we'd get a variety of fruit and veggies. our first week, we got brussels sprouts. i remember my mom trying to get me to eat them growing up, but i just wouldn't. they looked gross. and smelled weird. now that i'm all grown up, my taste buds have grown up with me.

last night was super busy-crazy for me: i went to the gym from work (taking the bus and trax), ran home to shower, put in a ham, start my laundry, do the dishes and clean the stove, and finish reading an article for homework. somewhere in there, i managed to call my mom and wish her happy birthday. whew. however busy my schedule gets, i can always find time to try a new recipe. i got brussels sprouts in my co-op basket this week. they were pretty small, which was good because that meant i didn't have to cut them in half and risk them falling apart.

i found this website via pinterest and decided to give it a go. i usually just sautee the sprouts with some garlic, onion, and lemon. side note: anything is delish when sauteed with those 3 ingredients!!! anyway, i followed the recipe (pretty much) and had good results:

INGREDIENTS
 
brussels sprouts, ends trimmed and icky leaves removed
3 T olive oil
2 t salt
1/2 t pepper
1/2 t onion salt
 
DIRECTIONS
 
preheat oven to 400*
place everything in a large resealable plastic bag
seal tightly and shake to coat
pour onto a baking sheet/roasting pan
roast for 30-45 minutes, shaking pan every 5 minutes for even browning


Thursday, December 20, 2012

Work "Hall"iday Party

For Thanksgiving this year, my office had a "hall"iday party, where everyone in our looong hallway participated......Mission-based Management, Dean's Finance, and School of Medicine Curriculum. Once again, it was a potluck. I swear, 99% of work parties are potluck. Not that it's a bad thing, but sometimes it's nice to go out and have an actual NICE meal together. Oh well.

So, being the go-getter that I am, I (stupidly) signed up to bring the turkey. Why? I don't know. I've already established myself as a capable cook, having never brought in something gross (I wouldn't bring it in, to be honest). Everything that I cook and bring in to work has to be Kasia-approved anyway. She would tell me if it was sub-par. If that EVER happens, you better believe I would scrap the project and start over. I've been in that awkward position too many times before where I've been forced to eat/try something gross that a coworker made. I do not wish that upon anyone. But I digress........

I had never baked a turkey before. I had baked a chicken or two, so that idea wasn't too foreign to me. However, it was THE turkey. Having never baked one before, I was unaware that it was best to purchase the bird days in advance to allow adequate time to thaw in the fridge. 3 days before the luncheon (shopping on Friday, party on Monday), I bought two 17lb birds. Frozen. Completely frozen. I didn't know how much turkey I should bring. We were feeding quite a few people and I didn't want anyone to have to scrimp on their portions.

I placed a panicked call to my mother to get some advice on thawing the birds. She gave me some great advice, but I still faced the daunting task of defrostation. The birds were heavy, and I didn't have enough time or fridge space for normal thawing. I had a "brilliant" idea and called Kasia on my way home from the store. I asked her if she could quickly do a once-over scrub on the bathtub. It was the only place I could theoretically thaw out the birds. Luckily, she is so used to my weird requests and didn't question me. When I got home, I realized that the birds wouldn't stay submerged in the tub. Kasia had the idea to use the plastic bin that I store my niece's toys in (I have since thrown it out.....no way was I going to let my niece play with toys that even came CLOSE to a raw bird). It worked!

 
The new problem was that they were still having a hard time staying submerged. We had to improvise with the crock pot and some large bowls:
 

Yes, we are white trash. Don't you just love how the edges are bowing out? I was afraid it was going to break at one point. Whatever, it worked. I had to make sure the temperature of the water was just right and changed it every 2-3 hours. It was a long Friday night. I'm pretty sure we went and saw the new James Bond movie that night too.

Let me just say this: I've mentioned before in a previous post that I can play with dead bodies and be totally fine with it. Handling a raw bird......not my strongest moment in life. I asked Kasia to stand by me next to the sink as I washed out the cavity, removed the gizzards, looked for little pinfeathers, and rinsed everywhere. I would seriously scream every time I felt one of the joints move. Those suckers were heavy! I think Kasia and I were crying by the end of it!! Who knew that a dead turkey's joints would still work?! Because I sure didn't! Woof!!
 
Saturday, I wanted to brine the turkey. I had researched a bunch and found that brining the turkey helps keep it moist and tasty. This was interesting. I bought 2 oven bags and a TON of sea salt. Once the birds were completely thawed out, I put about 2-3 cups of salt all over them, in the creases and in the cavity, stuck them in individual bags, and filled them with ice cold water, tying them up nice and tight. Normally, you're supposed to put them in the fridge for at least 12 hours. Well, we still didn't have room in the fridge. Good news: it was in the 20s outside and was going to stay below freezing all night long. So what did I do? I stuck them in the pink tub outside on the deck. Problem solved.

Sunday, I had a marathon of baking. I ended up cooking the birds upside-down. Why? I heard that it keeps the breasts moist. There's nothing worse than dry turkey meat. 3.5 hours into cooking, I flipped the bird over. I was careful to cook them thoroughly. I didn't want pink anything on the birds. Of course, I cooked them one at a time. I was excited when the first one came out looking pretty yummy:


I let him cool while I put in a ham for dinner. I know, I know. Yes, I cooked 2 turkeys and a ham in the same day. I wanted ham for Sunday dinner. It was delish! Anyway, once the first bird cooled, I carved him up (after watching a few how-to videos on YouTube) and put him in plastic baggies. I must admit, I was a little worried and skiddish about the whole carving idea. I once again, asked Kasia to just sit by me while I did it. Nothing major happened other than a LOT of laughing while I carved. I finished carving the second bird super late in the evening/morning. Both birds went into gallon-sized Ziploc baggies and then into 2 crock pots. No, I didn't take the train. What a trip that would be! Thank goodness a coworker lives close to me and helped me transport them to the office. Ironically, she's a vegetarian. Thankfully she wasn't opposed to helping me out a bit.....
 
The turkey was a hit! Everyone complimented how moist the meat was and how tasty overall. I was so excited! It's always a big deal when your first attempt at cooking something new is a hit.
 
What have I learned from this experience? 1. I can now cook a turkey or two. 2. I will never make one that has to be transported again!! Here is the recipe for just 1 bird. I obviously had to double everything!!
 
INGREDIENTS
 
2 c sea salt (for brine)
1/2 c butter, melted and UNSALTED
2 onions diced
4 carrots chopped
4 celery stalks chopped
2 sprigs fresh thyme
2 sprigs fresh rosemary
2 sprigs fresh sage
1 bay leaf
1 lemon
1 green apple
1 c dry white wine
 
DIRECTIONS
 
1. Rub turkey inside and out with the salt. Place the bird in a large oven bag, and cover with cold water. Place in the fridge (or outside if it's cold enough), and allow the turkey to soak in the mixture for at least 12 hours.
2. Preheat oven to 350* after brined. Thoroughly rinse the turkey and discard yucky salt water.
3. Brush the turkey with 1/2 of the melted butter. Place breast side down on a roasting rack in a shallow roasting pan. Stuff the turkey cavity with 1 onion, 1/2 the veggies and herbs, and the bay leaf. Cut the lemon in half and put half in the cavity. Cut the apple in half and remove seeds. Stuff both halves in the cavity.
4. Scatter the remaining veggies and herbs around the bottom of the roasting pan. Squeeze the other half of the lemon onto the bird and cover with white wine.
5. Roast uncovered 3.5-4 hours in the preheated oven, until the internal temp of the bird reaches 180*. Carefully turn the bird over about 2/3 of the way through cooking, and brush with the remaining butter. Allow the bird to stand about 30 minutes before carving.
 

Monday, December 3, 2012

Lumpia

 I know it's been a really long time since I've last blogged. I haven't had a lot of down time recently, but I'm trying to change that. I've gotten a lot of recipes lately from Pinterest, but have also discovered the lovely Mecca of all delicious recipes. I love how I can start looking at a type of recipe and then it evolves into something COMPLETELY different.

A few months ago, I started looking for recipes online that incorporated the "wombok" (or Napa Cabbage as it is referred to in the West) that Kasia and I got in our food co-op basket.

While looking for recipes, I ended up looking up a fun little thing called "LUMPIA." They're little egg rolls that are most common in the Philippines and Indonesia. I got so excited when I found a well-reviewed recipe because I realized that I'd had lumpia before. Years ago, I worked at Disney's California Adventure and had a Cast Member named Lee. He was awesome. One day, he gave me a little Styrofoam box filled with these delicious little egg rolls with a yummy sweet and sour chili sauce. I got nostalgic just looking at the recipe.

One thing I love about my coworkers is that everyone is eager to share information and help out in whatever way they can. I needed to find an Asian market in town to purchase some ingredients for the lumpia. One of my coworkers suggested the Southeast Market in downtown SLC. I was excited to finally have a recommended Asian market!! I went right after work and immediately realized that this place was authentic. I couldn't read most of what the products were on the shelves, and ended up having to ask the guy that worked there for help. I wanted to get specific lumpia wrappers and a chili sauce that I've heard was amazing.

After a successful trip to the market, I went to a few other stores to get the remaining ingredients. Finally, I was able to start cooking!! Another perk of making the lumpia was getting to use my wok!! I seriously love Love LOVE it!! The best part?? It's from IKEA........

Here's the awesome recipe:

1 T veggie oil
1/2 lb ground pork
1/2 lb ground beef
2 cloves garlic, crushed
1/2 c chopped onion
1/2 c minced carrots
1/2 c chopped green onions
1 c thinly sliced wombok
1 t pepper, salt, garlic powder
1 t soy sauce
30 lumpia wrappers
1 c oil for frying
 
**This was the recipe I used.......but I added a lot more of the veggies it called for**
 
Directions:
 
Place a wok or large skillet over high heat, and pour in 1 T veggie oil. Cook meat, stirring frequently, until no pink is showing. Remove from pan and set aside. Drain grease, but leave a thin coating. Cook garlic and onion in the same pan for 2 minutes. Stir in the meat, carrots, green onions, and wombok. Season with pepper, salt, garlic powder and soy sauce. Remove from heat, and set aside until cool enough to handle.
 
Place 3 teaspoons of the filling diagonally near one corner of each wrapper, leaving a 1 1/2 inch space at both ends. Fold the side along the length of the filling OVER the filling, tuck in both ends, and roll neatly. Keep the roll tight as you assemble. Moisten the other side of the wrapper with water to seal the edge. COver the rolls with plastic wrap to retain moisture.
 
Heat a heavy skillet over medium heat, add oil to 1/2 inch depth, and heat for 5 minutes. Slide 3-4 lumpia into the oil. Fry for 1-2 minutes. Drain on paper towels and serve immediately!!
 
 
Here's what the little guys look like! They're supposed to be smaller than normal sized egg rolls that you would get at a restaurant. They are so delish!! Kasia and I just gobbled them up!!! The recipe made far more than we could eat in one sitting, so we ended up freezing the filling and made them again.
 
The soup in the picture is for a future post.........


Monday, August 27, 2012

Stuffed Peppers!!

Once upon a time, I had a co-worker who had a magical garden. This garden would produce more food than she knew what to do with. Enter...........ME! This is not a fairy tale, but at times it does seem too good to be true!
 
Some days I would show up to work and find a box full of peppers, tomatoes, tomatillos, and cucumber at my desk. What will I do with these treasures?? We no longer purchase salsa in our house, since Kasia and I prefer to make our own (which is more cost-effective and yummier).


So one day at lunch, I was looking around online for some inspiration. I saw that stuffing the banana peppers was a popular way to prepare them (since we weren't going to pickle them). After perusing through a few websites, I created a fun, easy, and delicious way to stuff them!!

 
Seriously, who could go wrong with cream cheese?!

 
I've never been a huge salami fan, but I am now a believer (along with my little brothers!)
 
 
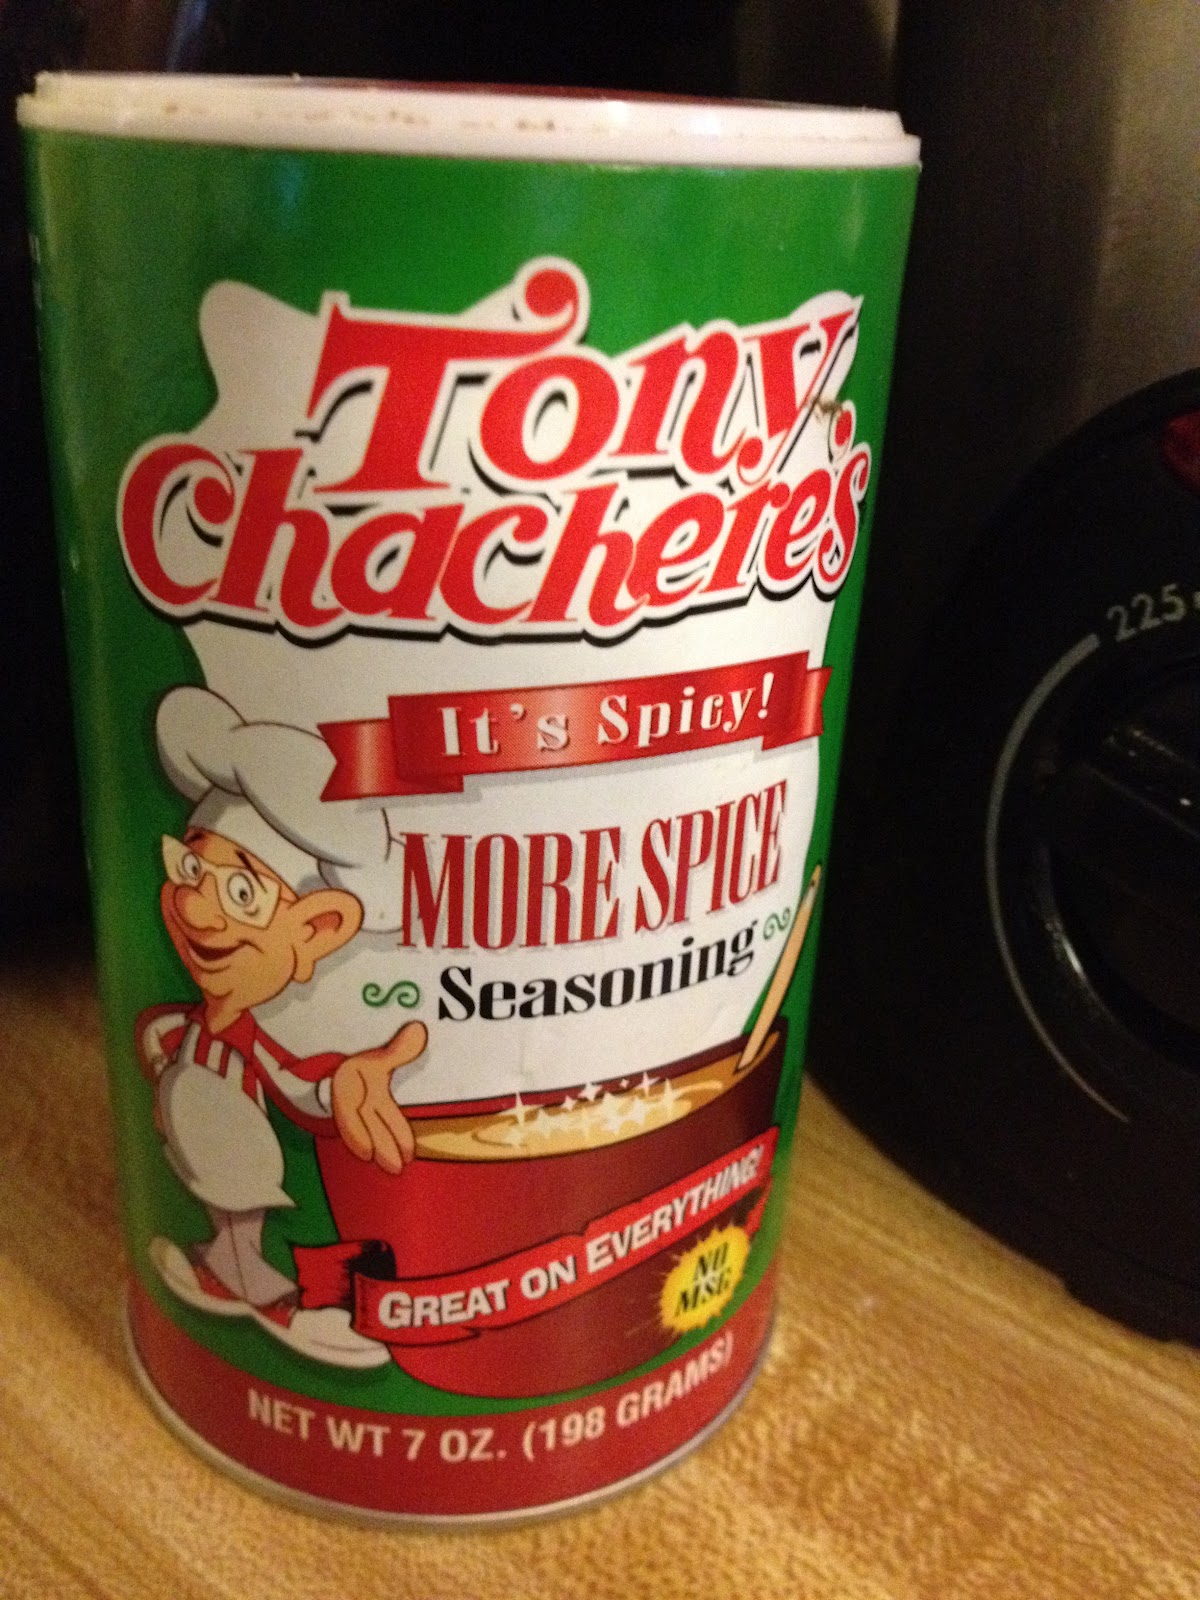
Key ingredient in cooking with Kasia and I: TONY'S!!!

 
Pretty simple: spread a spoonful of cream cheese on a salami slice and sprinkle Tony's on top!

 
Roll it up and shove it into the hollowed out peppers!

 
Place on an ungreased cookie sheet and bake for 25 minutes at 350* (the oil from the peppers help them not to stick).

 
These were so delicious! The heat of the peppers gets cooked out, so if you want more heat, keep some of the seeds and membrane in the peppers or add them to the cream cheese. The best part is listening to them bake.........sizzle sizzle sizzle.........
 
Kasia and I love these and love to eat them as a movie-watching snack instead of popcorn!

Monday, June 25, 2012

HaPpY BiRthDaY cArA!!

last sunday was mine and kasia's friend cara's birthday. what better way to have a party than to bbq on a warm (okay, HOT) summer day?? it was so hot, i couldn't be barefoot on our deck. the bbq was so hot, i had to wear an oven mitt over my hand as i flipped the burgers, turned the corn, and dropped the jalapeno poppers! that was a first......

i was so excited to make the jalapeno poppers since it had been quite a while since we've had them. kasia and i set off early saturday morning to the farmer's market in downtown salt lake city in search of veggies for the bbq. we were sad to see that it was still a little too early in the season to get what we needed. we got cherries and snap peas instead.....we always win when we go.


so the jalapeno poppers......so much fun to learn to make. bacon takes food to the next level. who doesn't love a veggie wrapped in bacon that is stuffed with cream cheese???


ingredients

*jalapenos, halved and seeded (depending on the hotness you want)
*2 bricks cream cheese
*1/4 c grated cheddar cheese
*1/2 bunch green onions, chopped
*bacon (1 per jalapeno)
*TONY'S
*toothpicks


the first thing you want to do is make the stuffing for the poppers. the longer it has to harden and set, the easier they are to stuff and grill. i usually try to make the stuffing a day before and just let it chill in the fridge. dice up the onions and toss them in a bowl with the softened cream cheese, grated cheese, and as much TONY'S as you want!

ps......DON'T heat up the cream cheese!!!!!! i didn't do this, but i know some people might think, oh, i can just throw it in the microwave! wow, not smart. i usually just take them out of the fridge an hour before i make the stuffing


while the stuffing is chilling in the fridge (or the next day), it's time to get the jalapenos ready!! kasia taught me to blanch them so the keep the awesome green coloring. it also makes the peppers easier to work with. when i make these, i usually take out all of the seeds and membrane......mainly because i personally don't think the people of utah know how to handle heat. after i seeded and cut them, i tossed the jalapenos into a pot of boiling water for 2-3 minutes. i immediately put them in an ice bath. they are so beautiful!!!!!


the next step is the best in my mind......BACON!!!!! you'll want to partially cook the bacon so they don't have to spend as much time on the grill.....

we had so much bacon we had to cook!!!! i had over 2 dozen poppers......so i needed 2 pounds of bacon!!


it got to the point when i had to get out kasia's cast iron pan to double fist the frying.


i felt like i was having a heart attack just looking at the pile of bacon grow.......especially since the pieces aren't cooked all the way through. i will tell you though, our kitchen smelled amazing!!! bacon plus the smell from the grill!!!!


after the bacon is cooked, it's time to stuff the peppers!! i wanted to give the bacon time to cool off....since i'll be man-handling the bacon and don't want hot grease on my hands. fill the pepper until it's level with the sides of the halved pepper. you don't want it too full!!!!


i think this was all of them. the good news was that i was able to do this in the living room while i was watching mine and kasia's favorie movie....FAST FIVE!!!


next step is to wrap the peppers with bacon.......which then turns them into the poppers!! it's a good idea to soak the toothpicks for 10 minutes before using them...this way they don't burn on the grill. i forgot, but it wasn't the end of the world!! wrap 1 piece of bacon per pepper, using the toothpicks liberally. i usually use 2-3 per popper. throw them in the fridge until just before putting them on the grill!!


last step is to throw them on the grill!! the benefit of leaving them in the fridge is to keep the cream cheese from melting as quickly and oozing out of the edge of the pepper. these things bbq fast, so don't turn your back on them!!!

i don't have an "after" picture because they went pretty quick!! always a crowd pleaser!!!!!

HAPPY BIRTHDAY CARA!!!!!!!!!

Monday, June 4, 2012

coconut lime sugar cookies


so in a previous post, i mentioned that Kasia and i have an addiction to limes. this follows in that vein. how can we help it when limes are so cheap, so easy, and soooo delish? i found another recipe on pinterest for these coconut lime sugar cookies. i knew i had a bag of shredded coconut left over from a previous roommate, and the limes were a no-brainer. it was fate. again, no trouble getting Kasia on board with this one!

INGREDIENTS:

*2 1/4 C flour
*1/2 t baking soda
*1 t baking powder
*1/2 t salt
*1 1/2 C sugar, plus 1/3 C for rolling
*2 oz cream cheese, cut into 8 pieces
*1/2 C sweetened shredded coconut, chopped fine
*6 T unsalted butter, melted and still warm
*1/3 C vegetable oil
*1 large egg
*1 T milk
*2 limes, juice and zest


DIRECTIONS:

*preheat oven to 350*
*in a medium bowl, whisk together the flour, coconut, soda, powder, and salt
*in a large bowl, add 1 1/2 C sugar, lime zest, and cream cheese
*pour warm butter over the cream cheese mixture and whisk to combine.......the mixture won't be completely smooth yet, and that's fine
*add oil, egg, milk, and lime juice to cream cheese mixture and mix until smooth
*use a rubber spatula to fold the dry ingredients into the wet, until a soft dough comes together
*scoop dough into balls and roll in sugar
*place dough on cookie sheet and use the bottom of a glass to flatten a little
*bake cookies, one tray at a time, for about 10-11 minutes
*let cool on cookie sheet for 5 minutes before transferring to a cooling rack


these were the softest sugar cookies that i've been able to make. we made ours a little on the smaller side so we could have enough to deliver to friends. Kasia was smart and made up a little glaze with powdered sugar, lime juice, coconut, and butter to drizzle on top. i think when we were all done, we had close to 80 cookies. we took some up to our cute little neighbors upstairs and put them in their newly painted cookie jar. so fun!

i love cauliflower soup!!

i swear pinterest is going to be the death of me. i take a gander every now and then while on my lunch or at home. i found a recip for the Cafe Zupas' Cauliflower Soup. i was dying to make it and didn't think i'd have a hard time selling it to Kasia. we both love Zupas and so why not try to recreate it in our own kitchen? i wanted to have it ready for Kasia when she got off of work, but it took a little longer than i had expected to get it smooth and creamy. plus, i had to watch an episode of my favorite TV show NCIS!

ok, so i mentioned that i found the recipe on pinterest. i don't have the time/money/energy/space to come up with things like this on my own yet. i do love taking pictures of my ingredients before they become dinner/lunch/leftovers (which is what i have for lunch today!)

INGREDIENTS

*2 T butter
*1 medium onion, chopped
*1/4 C flour
*1/2 t salt
*2 C milk
*1 1/2 C water
*1 can chicken broth
*1 head cauliflower, cut into 1" pieces
*1 t dijon mustard
*1 C shredded cheddar cheese
*1 C shredded pepper jack cheese
*paprika
*Tony's cajun seasoning (a staple at our house)
*dash of tobasco sauce


DIRECTIONS

*melt butter over medium heat in a large pot
*add onion and cook until golden, stirring occasionally
*stir in flour and salt; cook 2 minutes, stirring frequently
*gradually add in milk, chicken broth, and water
*add cauliflower
*bring to a boil and reduce heat to low
*cover pot and let simmer about 15-20 minutes until cauliflower is tender
*scoop mixture into a blender, small batches at a time (with center blender cover removed to allow steam to escape)
*return mixture to saucepan and keep heat on medium until hot, stirring occasionally
*remove saucepan from heat
*stir in mustard and cheese until melted an smooth
*add spices and tobasco to taste

**make sure to blend until smooth**

i love this soup and was eager to share it. i called my bff natalie and she brought some rolls that we slathered with butter and tossed in the oven. so good!!