Monday, January 6, 2014

Pasta, Collard Greens, and Squash Au Gratin

School starts again today, so I have to make sure and cook a lot every weekend. I have class after work on Mondays and Wednesdays, so I try to bring both lunch AND dinner to work. I'm trying to not buy things at the cafeteria and eat fast food, so I have to get creative with cooking and leftovers. I'm not a huge leftover person, so I have to be selective. With that in mind, I made quite a lot last night after church! Due to the quickness of cooking, I wasn't able to take any of my own pictures. Sad day, I know. The following pictures are from Google searches.

First on the docket: Spaghetti sauce. This is a good stand-by meal for leftovers, since most sauces are better the longer they sit. I usually allow the sauce to simmer for at least 3 hours on the stove, so it was essential that I get this going as soon as I got home. Ah, the "perks" of having 1pm church with Sacrament meeting last.

I don't remember where I originally got this recipe from, and I've changed it a few times.

Pasta Sauce:
Ingredients
2 lbs ground beef
1/2 lb bacon (diced and fried)
2 6 oz cans tomato paste
12 oz water
1 24 oz jar tomato puree/diced tomatoes
5-6 garlic cloves, minced
1 onion, diced
2-3 T honey
1 t oregano
1 t garlic powder
1 t onion powder
1 t red pepper flakes
handful fresh basil, chopped
salt and pepper to taste

Directions
*saute garlic and onion until soft in olive oil
*toss in ground beef and brown, season with salt/pepper
*pour in the rest of the ingredients, and simmer uncovered for at least 2 hours
*stir occasionally

**I usually let it go for over 3 hours for the ingredients to marry. I like to add the bacon and onion for more depth to the flavor. If you have fresh tomatoes, use half fresh/half canned

I love having pasta sauce on hand. It's a quick meal for those late nights or for days that I forget to make something for lunch. I also like to keep a container of it in the fridge at work. It will keep for a few days, at least, and make all my coworkers drool!

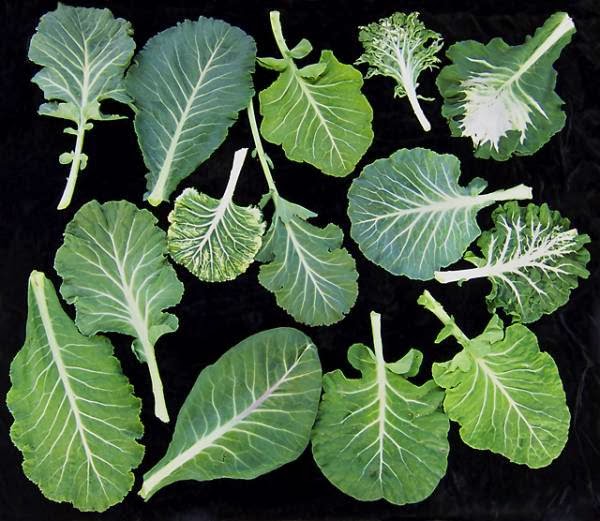
The next thing I made was sauteed collard greens. I didn't mean to make them...I actually thought I had purchased Swiss Chard. Mental note: don't go grocery shopping when I'm exhausted!! Collard Greens are really good for you, but much harder to cook. Well, maybe not harder...they just take a little longer and need to be broken down more.

I like my dark greens (kale, chard, b.Z.) as unadulterated as possible. I usually just like to steam/saute them with just a few ingredients. There's no real recipe that I follow, but it usually takes about 15 minutes to cook...10 to boil, 5 to saute. Here's what I did for the Collard Greens:

*remove stalks from each leaf and cut into strips
*boil/steam strips until soft (about 10 minutes)
*saute with thinly sliced onion, garlic, salt/pepper
*add lemon zest when almost done

Collard Greens are pretty bitter, so be aware. Sometimes people put bacon in with them to boost the flavor. I used the bacon I had for the pasta sauce. The last thing I made was called "Spaghetti Squash Au Gratin." I got the recipe from Dandy Dishes on Pinterest and saw that my aunt made it and loved it. So why not? 

Spaghetti Squash Au Gratin
Ingredients
1 medium spaghetti squash
2 T butter
1 yellow onion, cut in half and very thinly sliced
1/2 t red pepper flakes
1 t fresh thyme
1/2 c sour cream
1/2 c shredded cheddar cheese

Directions
*cut the spaghetti squash in half and remove the seeds
*place in a covered dish with 1/4" of water and microwave for 12 minutes
*in a med skillet, add butter, onions, red pepper, and thyme, and cook until onions are soft
*using a fork, scrape the insides of the squash and transfer to a small bowl


*combine the squash, onions, sour cream, and half of the cheese
*mix well and season with salt/pepper
*transfer the mix to a buttered 8x8 or 9x9 baking dish
*top with remaining cheese
*bake at 375* for 15-20 minutes until golden brown


Thanks to the sour cream and cheddar, it tastes similar to funeral potatoes. I also added some finely chopped chives to the top before I baked it, mainly for color. It was too yellow/orange for my liking. 

Monday, July 1, 2013

30-day Green Smoothies!!

Today while farting around online, I came across this website, which encourages people to try a 30-day green smoothie challenge. Challenge: ACCEPTED! I've made green smoothies before and love them. My coworker calls the drink "sludge," which is a legit description of the drink. I don't have a picture of it, but the recipe is:

2 cups water
1/2 head of lettuce or spinach (the greener the better)
1 green apple
1 pear
1 banana
3-4 stalks celery
handful cilantro
handful parsley
juice of 1 lime

Blend everything together. I leave the skin on the apple and pear, which is where a lot of the vitamins are located. It's okay to blend the stalks of the cilantro and parsley together too. The key to this drink is to make sure that it gets blended enough. I usually drink it through a straw on my way to work...mainly because I don't want to have chunks of parsley or cilantro in my teeth. I don't want to draw any weird looks from people on the train.

So back to the 30-day challenge. I am so excited. Kasia and I just recently moved, so we've been without a proper kitchen for almost 3 weeks now, and haven't been grocery shopping in almost 4. Fast food saved us, but we are so totally DONE! I haven't been eating as many veggies as I like due to moving and traveling to SoCal, so this challenge would help get me back into it! When you sign up for the website challenge (for free), they send you a shopping list for the smoothie recipes they provide. I can't wait to go shopping!!

Tuesday, May 7, 2013

SaLsA FiEsTa!!!

i love it when good things/ideas become traditions. my cinco de mayo salsa fiesta has become just that. i can't believe it's been a year since our last one. a few weeks ago, i found myself creating a new board on pinterest for salsa. i got super excited for it and was anticipating a good turnout again. who knew that cinco de mayo would be the happening holiday??

i wanted to do a few things different this year, but was limited to only making 8 again. i realized that i need to create a "salsa fund" that i can build up throughout the year. i contented myself with making only 8 salsas this year. i had a few favorites that were repeats, so i won't post the instructions.......you can find them on this post from last year. why did i duplicate? mainly because they were the ones that i didn't have enough of last year or they were requested. 

this year i found myself making all of the salsas the night before and the morning of.......mainly to take advantage of the produce sales at the markets. i don't coupon, but it's nice to save $2-3 on avocados!!! i hosted about 45 people again in our little apartment. i cringe to think of what my floors looked like after. i couldn't wait another day before vacuuming and steam cleaning the kitchen floor. dishes are done, pictures are waiting to be posted, and my coworkers are happily enjoying my leftover salsa that i'm spreading out through the week. today it's PINEAPPLE and FIRE AND ICE (watermelon). who knows what tomorrow will bring!!

okay, so on to the fun stuff! the duplicates from last year:
i had to put a little aside since i knew this one would be gone...so glad that i did!!

i doubled the recipe from last year

i always double this one b/c i can take it to work and eat it as lunch for days

i doubled this recipe at the request of my home teacher rob...this is his favorite so i made him a little care package 

now onto the new ones. i got all of these recipes from Pinterest and have lightly adapted them to fit what i had/wanted. the sources can be found off of my salsa board. i will start with my favorite:

i love the flavor of roasted habaneros now!!

ROASTED HABANERO
6 roma tomatoes, diced (discard the goopy stuff and seeds)
2 habanero peppers, roasted and finely diced (directions below)
1 jalapeño pepper, finely diced
1/2 red onion, diced
6 cloves garlic, diced
handful of cilantro, finely chopped
juice of 1 lime
1 T olive oil
1 t red wine vinegar
salt and pepper to taste

DIRECTIONS
*half the habaneros and cut out seeds and membrane
*line cookie sheet with tin foil
*roast habaneros on cookie sheet on broil for 4 minutes (until they start to blacken)
*combine tomatoes, peppers, onion, garlic, and cilantro
*whisk together lime juice, oil, vinegar, and spices
*toss together

**side note**
when pulling out the habaneros from the oven, DON'T BREATH!! i made the mistake of normally inhaling when i opened the oven and nearly aspirated a lung from coughing so hard. also, make sure to wear gloves any time you handle the habaneros. i've never had to learn the hard way, thank goodness!!

i love peaches!!

INGREDIENTS
4-6 peaches, finely diced (choose peaches that are still a little on the firm side, which will make dicing them easier!)
1 yellow bell pepper, finely diced (next time i will also add an orange one for color)
2 roma tomatoes, diced
1 jalapeño, diced
1/2 red onion, diced
handful of cilantro, finely chopped
juice of 1 lime
1/4 t chili pepper
1 T brown sugar, packed
salt and pepper to taste

DIRECTIONS
toss everything together!!

**side note**
i think next time i make this one, i'll not only add the extra bell pepper, but maybe some more chili pepper for a bigger kick........

right??????

INGREDIENTS
6 kiwi, diced (make sure they're on the firm side)
1 jalapeño, finely diced
1/2 white onion, diced
handful of cilantro, chopped
juice of 1 lime

DIRECTIONS
gently toss everything together

**side note**
this had to be the most interesting salsa i've ever made. i used a potato peeler to peel the kiwi, but thought about halfway through that a paring knife would have been a little easier to use. the peeler kept getting furry........

watermelon is the bomb.com!!

INGREDIENTS
1/2 of a seedless watermelon, diced
bunch of green onions, copped
1 jalapeño, diced
1/2 white onion, diced
bunch of cilantro, chopped
juice of 2 limes

DIRECTIONS
*chop up watermelon and set aside until ready to serve
*combine onions, pepper, and cilantro in separate bowl
*when ready to serve, combine everything together and juice limes over

**side note**
the hardest part of this one was chopping up the watermelon smaller than what i'm used to. i had to keep reminding myself that this was for salsa, not just to eat. also, by keeping the watermelon separate, it gave the juice a chance to settle to the bottom, saving the salsa from becoming a gazpacho!!

taa-daa!!!
i love salsa!!! special shout-out to my lovely cara, who made an awesome 7 layer dip, cameron, who brought a tres leches cake that i requested (he brought one last year and it was delish!), daniel for the pan dulce, and everyone else that brought something to help out. here are some pictures from the party!!!


Friday, February 1, 2013

Rats!!!

bwahahahaha just kidding with the whole rats thing. i didn't know what ratatouille was until i saw the awesome disney movie!! how could i have not known about this deliciousness???? well, the point is that i do now.

i had wanted to make it for a while and finally found a recipe that i liked (i'm not a big fan of french food). of course my first pass at the dish didn't look as pretty as some of the pictures online:


however.....it tasted pretty amazing and kasia and i enjoyed our leftovers!!!

ingredients:
red bell pepper
1 yellow squash
1 zucchini
1 eggplant
1/2 onion, diced
1 c tomato puree
2 garlic cloves, very thinly sliced or diced
1/4 t oregano
1/4 t crushed red pepper flakes
2 T olive oil, separated
fresh thyme
salt and pepper to taste

directions:
preheat oven to 375*

pour tomato puree into oval baking dish
mix in oregano, pepper flakes, 1 T olive oil, onion, and garlic
season with salt and pepper to taste


trim ends off of veggies and remove seeds/membrane from bell pepper
USE A MANDOLINE!! i didn't and regretted it!! slice the pepper, squash, zucchini, and eggplant about 1/16 of an inch thick


starting on the edge, alternate setting down the veggies in the puree mixture in a pretty pattern shown above......enter the help of the mandoline!! the thinness of the veggies will help you keep a beautiful pattern


drizzle the last T of olive oil over the top, add salt and pepper and fresh thyme (i always go heavy on the thyme and just LOVE it!!)


cover with parchment paper

bake 45-55 minutes
DO NOT OVERCOOK because you really don't want soggy veggies


things that i would change for next time: if i was going to attempt the pretty pattern, i would definitely use a mandoline. our kitchen could benefit from another fun gadget!! i am not a big fan of eggplant. i wouldn't put it in the same category as olives and mushrooms, but i didn't like eating a thick slice of the eggplant.

i might try the more traditional french style of ratatouille:


.........where i don't have to worry about the pattern. the presentation is still gorgeous and i'm sure it tastes great......as long as the eggplant is still small and thin (much to kasia's chagrin) 

i baked this as a side dish to baked chicken and bacon-wrapped asparagus which will be another blog posting.........


Saturday, January 26, 2013

If avocados could marry...I'd totally be the mistress!!

i love avocados! seriously, what kind of california girl would i be if i didn't?? last week, 4 little avocados arrived in our basket. what to do.......what to do.......?? my life has been pretty hectic lately, so cooking has been virtually non-existent. luckily i found this blog and decided to give it a go. kasia and i had already purchased plain greek yogurt for some fruit smoothies, so it was settled!! i love guacamole, but this was a little different, as i mixed in yogurt instead of my homemade salsa this time.


i didn't follow the recipe measurements, but the ingredients are the same:

3 avocados
3/4 c plain greek yogurt
handful of cilantro
tablespoon minced garlic
couple dashes of cumin
1 jalapeno 
juice of 1 lime
salt and pepper to taste


the directions are pretty simple.........put everything in the blender (or food processor) and blend it all up!!!!!!


voila!! best eaten with pita chips!!!!

Tuesday, January 15, 2013

What? Brussels Sprouts are DELISH!!

i remember the exact moment when i decided that i liked brussels sprouts. i know it's a weird thing to remember, but weird things tend to be easier to remember than run-of-the-mill stuff. wow. so when kasia and i decided to join the Bountiful Baskets food co-op, we knew that we'd get a variety of fruit and veggies. our first week, we got brussels sprouts. i remember my mom trying to get me to eat them growing up, but i just wouldn't. they looked gross. and smelled weird. now that i'm all grown up, my taste buds have grown up with me.

last night was super busy-crazy for me: i went to the gym from work (taking the bus and trax), ran home to shower, put in a ham, start my laundry, do the dishes and clean the stove, and finish reading an article for homework. somewhere in there, i managed to call my mom and wish her happy birthday. whew. however busy my schedule gets, i can always find time to try a new recipe. i got brussels sprouts in my co-op basket this week. they were pretty small, which was good because that meant i didn't have to cut them in half and risk them falling apart.

i found this website via pinterest and decided to give it a go. i usually just sautee the sprouts with some garlic, onion, and lemon. side note: anything is delish when sauteed with those 3 ingredients!!! anyway, i followed the recipe (pretty much) and had good results:

INGREDIENTS
 
brussels sprouts, ends trimmed and icky leaves removed
3 T olive oil
2 t salt
1/2 t pepper
1/2 t onion salt
 
DIRECTIONS
 
preheat oven to 400*
place everything in a large resealable plastic bag
seal tightly and shake to coat
pour onto a baking sheet/roasting pan
roast for 30-45 minutes, shaking pan every 5 minutes for even browning


Thursday, December 20, 2012

Work "Hall"iday Party

For Thanksgiving this year, my office had a "hall"iday party, where everyone in our looong hallway participated......Mission-based Management, Dean's Finance, and School of Medicine Curriculum. Once again, it was a potluck. I swear, 99% of work parties are potluck. Not that it's a bad thing, but sometimes it's nice to go out and have an actual NICE meal together. Oh well.

So, being the go-getter that I am, I (stupidly) signed up to bring the turkey. Why? I don't know. I've already established myself as a capable cook, having never brought in something gross (I wouldn't bring it in, to be honest). Everything that I cook and bring in to work has to be Kasia-approved anyway. She would tell me if it was sub-par. If that EVER happens, you better believe I would scrap the project and start over. I've been in that awkward position too many times before where I've been forced to eat/try something gross that a coworker made. I do not wish that upon anyone. But I digress........

I had never baked a turkey before. I had baked a chicken or two, so that idea wasn't too foreign to me. However, it was THE turkey. Having never baked one before, I was unaware that it was best to purchase the bird days in advance to allow adequate time to thaw in the fridge. 3 days before the luncheon (shopping on Friday, party on Monday), I bought two 17lb birds. Frozen. Completely frozen. I didn't know how much turkey I should bring. We were feeding quite a few people and I didn't want anyone to have to scrimp on their portions.

I placed a panicked call to my mother to get some advice on thawing the birds. She gave me some great advice, but I still faced the daunting task of defrostation. The birds were heavy, and I didn't have enough time or fridge space for normal thawing. I had a "brilliant" idea and called Kasia on my way home from the store. I asked her if she could quickly do a once-over scrub on the bathtub. It was the only place I could theoretically thaw out the birds. Luckily, she is so used to my weird requests and didn't question me. When I got home, I realized that the birds wouldn't stay submerged in the tub. Kasia had the idea to use the plastic bin that I store my niece's toys in (I have since thrown it out.....no way was I going to let my niece play with toys that even came CLOSE to a raw bird). It worked!

 
The new problem was that they were still having a hard time staying submerged. We had to improvise with the crock pot and some large bowls:
 

Yes, we are white trash. Don't you just love how the edges are bowing out? I was afraid it was going to break at one point. Whatever, it worked. I had to make sure the temperature of the water was just right and changed it every 2-3 hours. It was a long Friday night. I'm pretty sure we went and saw the new James Bond movie that night too.

Let me just say this: I've mentioned before in a previous post that I can play with dead bodies and be totally fine with it. Handling a raw bird......not my strongest moment in life. I asked Kasia to stand by me next to the sink as I washed out the cavity, removed the gizzards, looked for little pinfeathers, and rinsed everywhere. I would seriously scream every time I felt one of the joints move. Those suckers were heavy! I think Kasia and I were crying by the end of it!! Who knew that a dead turkey's joints would still work?! Because I sure didn't! Woof!!
 
Saturday, I wanted to brine the turkey. I had researched a bunch and found that brining the turkey helps keep it moist and tasty. This was interesting. I bought 2 oven bags and a TON of sea salt. Once the birds were completely thawed out, I put about 2-3 cups of salt all over them, in the creases and in the cavity, stuck them in individual bags, and filled them with ice cold water, tying them up nice and tight. Normally, you're supposed to put them in the fridge for at least 12 hours. Well, we still didn't have room in the fridge. Good news: it was in the 20s outside and was going to stay below freezing all night long. So what did I do? I stuck them in the pink tub outside on the deck. Problem solved.

Sunday, I had a marathon of baking. I ended up cooking the birds upside-down. Why? I heard that it keeps the breasts moist. There's nothing worse than dry turkey meat. 3.5 hours into cooking, I flipped the bird over. I was careful to cook them thoroughly. I didn't want pink anything on the birds. Of course, I cooked them one at a time. I was excited when the first one came out looking pretty yummy:


I let him cool while I put in a ham for dinner. I know, I know. Yes, I cooked 2 turkeys and a ham in the same day. I wanted ham for Sunday dinner. It was delish! Anyway, once the first bird cooled, I carved him up (after watching a few how-to videos on YouTube) and put him in plastic baggies. I must admit, I was a little worried and skiddish about the whole carving idea. I once again, asked Kasia to just sit by me while I did it. Nothing major happened other than a LOT of laughing while I carved. I finished carving the second bird super late in the evening/morning. Both birds went into gallon-sized Ziploc baggies and then into 2 crock pots. No, I didn't take the train. What a trip that would be! Thank goodness a coworker lives close to me and helped me transport them to the office. Ironically, she's a vegetarian. Thankfully she wasn't opposed to helping me out a bit.....
 
The turkey was a hit! Everyone complimented how moist the meat was and how tasty overall. I was so excited! It's always a big deal when your first attempt at cooking something new is a hit.
 
What have I learned from this experience? 1. I can now cook a turkey or two. 2. I will never make one that has to be transported again!! Here is the recipe for just 1 bird. I obviously had to double everything!!
 
INGREDIENTS
 
2 c sea salt (for brine)
1/2 c butter, melted and UNSALTED
2 onions diced
4 carrots chopped
4 celery stalks chopped
2 sprigs fresh thyme
2 sprigs fresh rosemary
2 sprigs fresh sage
1 bay leaf
1 lemon
1 green apple
1 c dry white wine
 
DIRECTIONS
 
1. Rub turkey inside and out with the salt. Place the bird in a large oven bag, and cover with cold water. Place in the fridge (or outside if it's cold enough), and allow the turkey to soak in the mixture for at least 12 hours.
2. Preheat oven to 350* after brined. Thoroughly rinse the turkey and discard yucky salt water.
3. Brush the turkey with 1/2 of the melted butter. Place breast side down on a roasting rack in a shallow roasting pan. Stuff the turkey cavity with 1 onion, 1/2 the veggies and herbs, and the bay leaf. Cut the lemon in half and put half in the cavity. Cut the apple in half and remove seeds. Stuff both halves in the cavity.
4. Scatter the remaining veggies and herbs around the bottom of the roasting pan. Squeeze the other half of the lemon onto the bird and cover with white wine.
5. Roast uncovered 3.5-4 hours in the preheated oven, until the internal temp of the bird reaches 180*. Carefully turn the bird over about 2/3 of the way through cooking, and brush with the remaining butter. Allow the bird to stand about 30 minutes before carving.